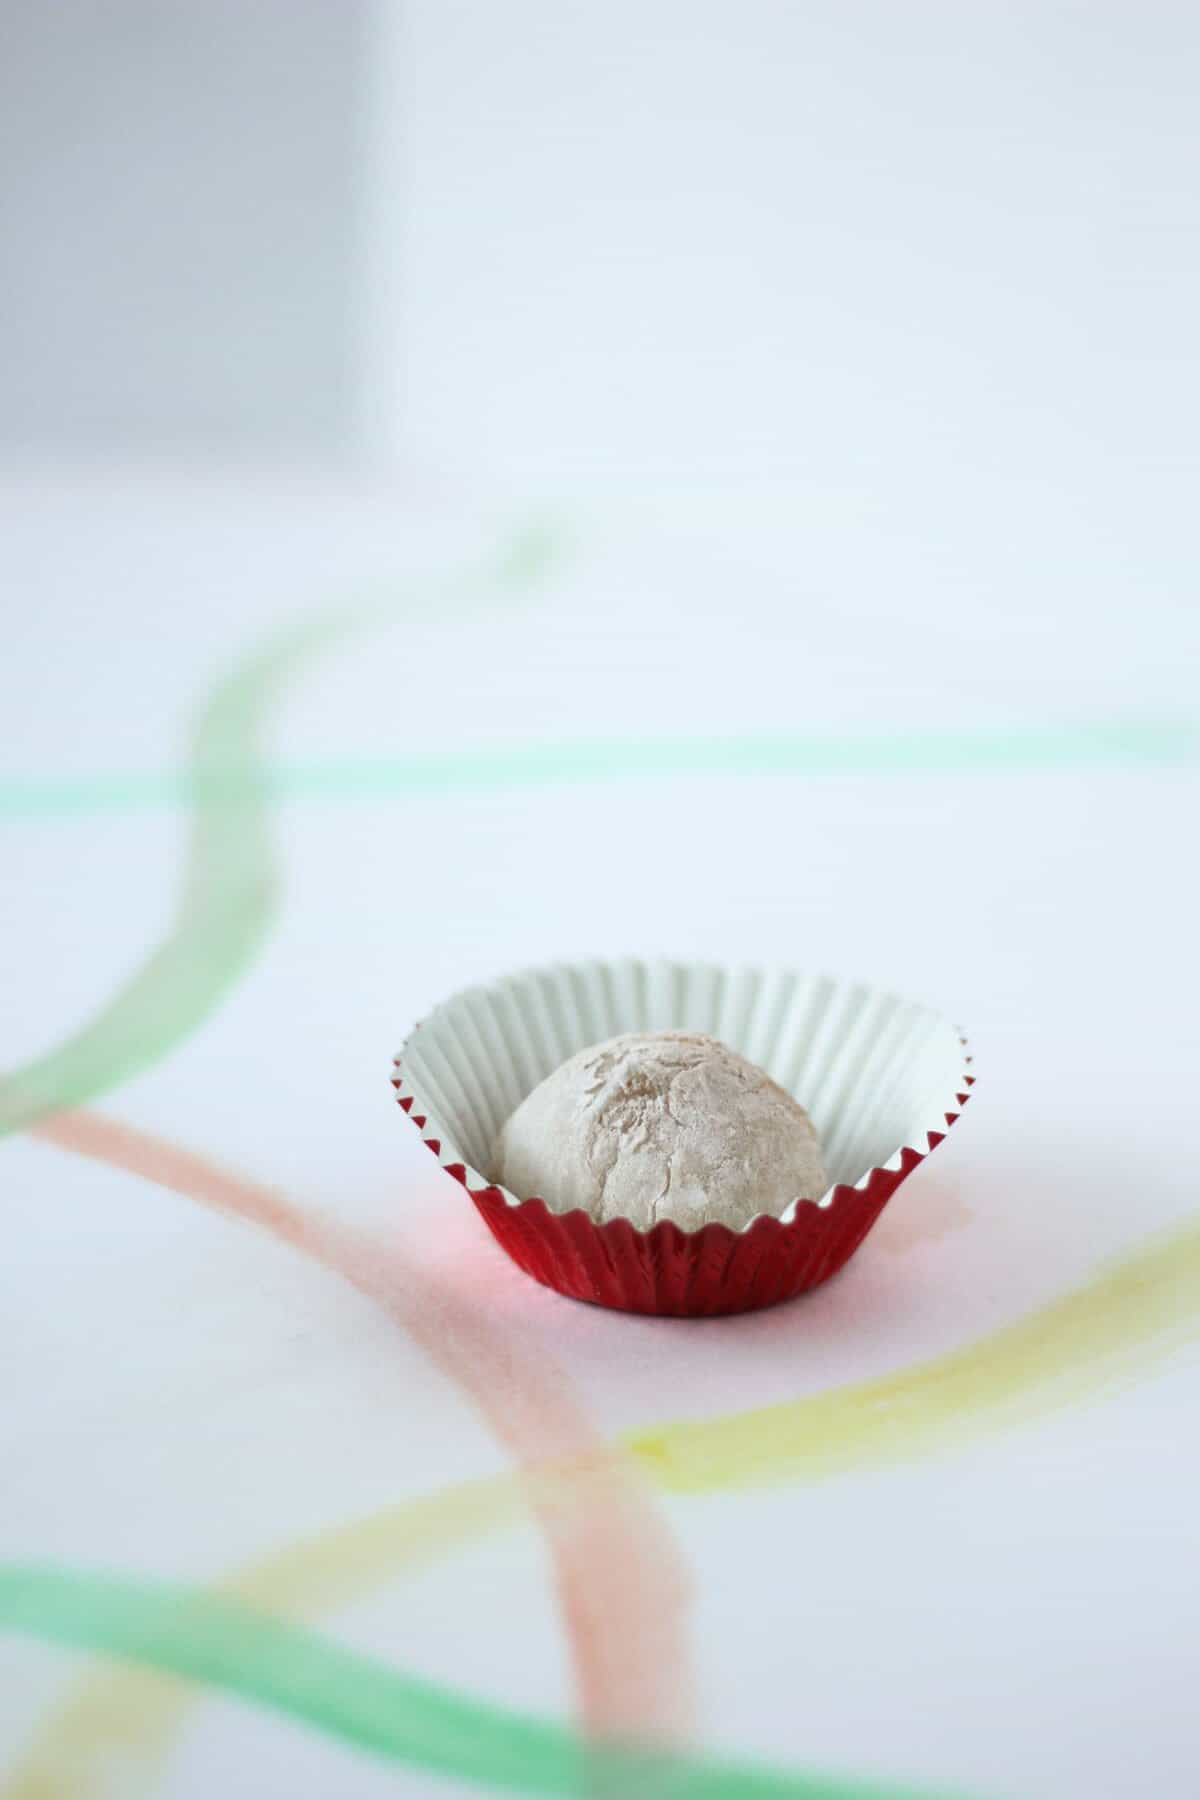
This chocolate mochi features soft and chewy mochi stuffed with a creamy chocolate truffle!
Ingredients
Most of these ingredients are pretty self explanatory, so let’s focus on the chocolate and the glutinous rice flour.
Chocolate
Any chocolate you like works here. That being said, my go to is dark chocolate (this recipe was developed using 72% chocolate) to make sure that the final dessert isn’t too sweet.
I probably wouldn’t recommend white chocolate, though again, you do you.

Glutinous Rice Flour
This is the key ingredient for anything chewy and mochi-like, from baked black sesame mochi to soupy tong1 yuhn4 to savory wu6 tau4 gou1 (taro cake).
There isn’t any substitute for this ingredient, so I wouldn’t recommend trying to game the system sneak in some tapioca starch instead.
Make sure that you’re using glutinous rice flour (also called sweet rice flour or mochiko) and not rice flour – the latter won’t give the same chewy, dense quality that glutinous rice flour will.
Flavoring
I didn’t add any extra flavoring to the chocolate ganache or to the mochi, but feel free to infuse some orange zest into the cream, or add a few drops of almond extract into the mochi if that’s your vibe!
I can also imagine how good a dribble of espresso would be, so long as you take out the same amount of cream or water (extra liquid will throw off the texture of the truffles/mochi/both!).
How to Make
Let’s start by making the chocolate truffles first. The ganache needs to chill for a bit before you can roll the truffles anyways.
Start by chopping the chocolate roughly, and heat the cream up until steaming. I like using the microwave for this step, or alternatively you can also heat the cream over the stove.
These two steps ensure that when two become one (no, I haven’t been binging Spice Girls…), the chocolate melts evenly as well as gently. You probably don’t want to deal with chunks of chocolate that refuse to melt down, and you definitely don’t want scorched and lumpy ganache.
Once the mixture looks homogeneous – no more solid bits of chocolate, no liquidy cream floating around – and it’s dark and shiny, it’s ready to be chilled for a few hours in the fridge to firm up. If you tried to roll these into balls right now, you’d end up with a chocolate hand mask rather than truffles.
While the chocolate ganache is cooling, start on the mochi. In a heat-proof bowl, combine the glutinous rice flour with water, and a little sugar and salt for seasoning.
The mixture might seem a little thick, especially if your brain is trying to correlate this texture to what you know mochi is like. I promise that the rice flour soaks up a lot of the water right now, and it’ll all come together after you steam it.
Place the bowl of mochi in a steamer over medium-high heat. Cook the mochi for 30-40 minutes, or until the flour is no longer raw tasting and the texture of the mochi is smooth and stretchy.
Feeling a little uncertain? I’d recommend testing the texture between your fingertips (carefully, since it’s hot!). It shouldn’t feel or look grainy.
Make sure to stir/scrape the bottom and the sides of the bowl too. Anything liquidy or grainy is a sign you should keep cooking.
The mochi is pretty forgiving, so it’s better to cook a little longer than undercook it. That being said, the mochi will firm up as it cools, so no need to steam until it looks and feels perfect.
If you don’t have a steamer, you can use one of the following options as a workaround:
1) DIY a steamer with a pot or pan and a little rack. Fill the bottom of the pot or pan with enough water to come halfway up the legs of the rack, then place the mochi on top. Even though you might have to refill the water while the mochi is steaming, and it will likely take longer than 30-40 minutes, it definitely works in a pinch.
2) Cover the mochi with plastic wrap and microwave on high, stirring every minute or so. The mochi cooks much more quickly than on the stovetop, so I’d recommend using the stove for newer and more tentative mochi makers.
Once the mochi is right where you want it, remove from the heat and let cool until lukewarm. If you try to wrap the chocolate truffles when the mochi is hot, welp, the chocolate will melt into a mess.
Time to switch tracks again and work on the truffles for a bit.
Divide the ganache into 16 equal pieces. Some recipes call for using a little teaspoon, but I think it’s a pain in the butt to have to dig your finger into the deep measuring spoon and coax the chocolate out, so I’d recommend using a normal spoon or spring loaded scoop.
You shouldn’t have to wrestle and cajole the ganache out, so if it’s giving you a tough time, let it warm up for a few minutes at room temperature before trying again.
Then, don some vinyl food safe gloves. These aren’t the surgical ones with powder in them; these are the ones that are clear and super thin and shiny, almost like you made a glove out of a flimsy plastic produce bag.
These are nice to have so that the chocolate gets on the gloves and not on your hands, and acts as another barrier between the warmth of your hands and the easily meltable chocolate.
Roll the pieces into spheres. They don’t need to be smooth or pretty, since the mochi will cover them.
Another key move: don’t dust them with cocoa powder. This might seem like a bad move – wouldn’t you want more chocolate?
That’s what my original assumption was when I was testing this recipe, but on the first bite, I knew I was wrong. The mochi was so dry and powdery, from the double whammy of cocoa powder and cornstarch, and I might have coughed a little.
TLDR, no cocoa coating.
If you notice the truffles are getting a little melty, or it’s warm inside your home, you can let them hang out in the fridge for a bit as you go back to the mochi.
Hopefully by now, the mochi should have cooled a bit, while still warm to the touch. That’s perfect.
Get a big cutting board out so that you can plop the mochi somewhere and have space to work. I wouldn’t suggest doing this straight on the counter, since it’s easier to bring the cutting board for clean up rather than bending over the counter scrubbing away the stubborn mochi.
Dust the cutting board generously with cornstarch. It might seem like too much but not to worry, you can always brush the excess off of the mochi later on.
You can also mix in a little cocoa powder into the cornstarch if you’re craving a little extra chocolate here.
Pour the mochi out onto the cornstarch and divide it into 16 equal pieces, dipping and coating any sticky edge of the mochi with more cornstarch.
By this time, the mochi should be just warm to the touch. Should your mochi still be too hot, take a break, eat a snack, take a 5-10 minute nap.
Assuming for the sake of this post that the mochi is at the right temperature, take a piece and flatten it in your palm until the mochi disc looks wide enough to encase a chocolate truffle.
(There might still be chocolate truffle remnants on your gloves that get onto the mochi and that’s fine – it adds a bit of a marble look! I also like that it gives you a visual hint of what’s inside the otherwise snowy white mochi).
Don’t worry if it takes a little bit of practice until you can judge how much to press each mochi piece.
Place a chocolate truffle in the center of the flattened mochi, and wrap the mochi around the truffle until it’s sealed and there’s no chocolate peeking out or gaps in the mochi.
We’re not mochi pros here (or at least I’m not), so I try to make the mochi smooth and taut on one side, and gather the edges on the other side. You can tuck the mochi, lumpy edge gathered side down, into a cupcake wrapper to hide some of the imperfections if you’d like.
Repeat and serve!
Taste
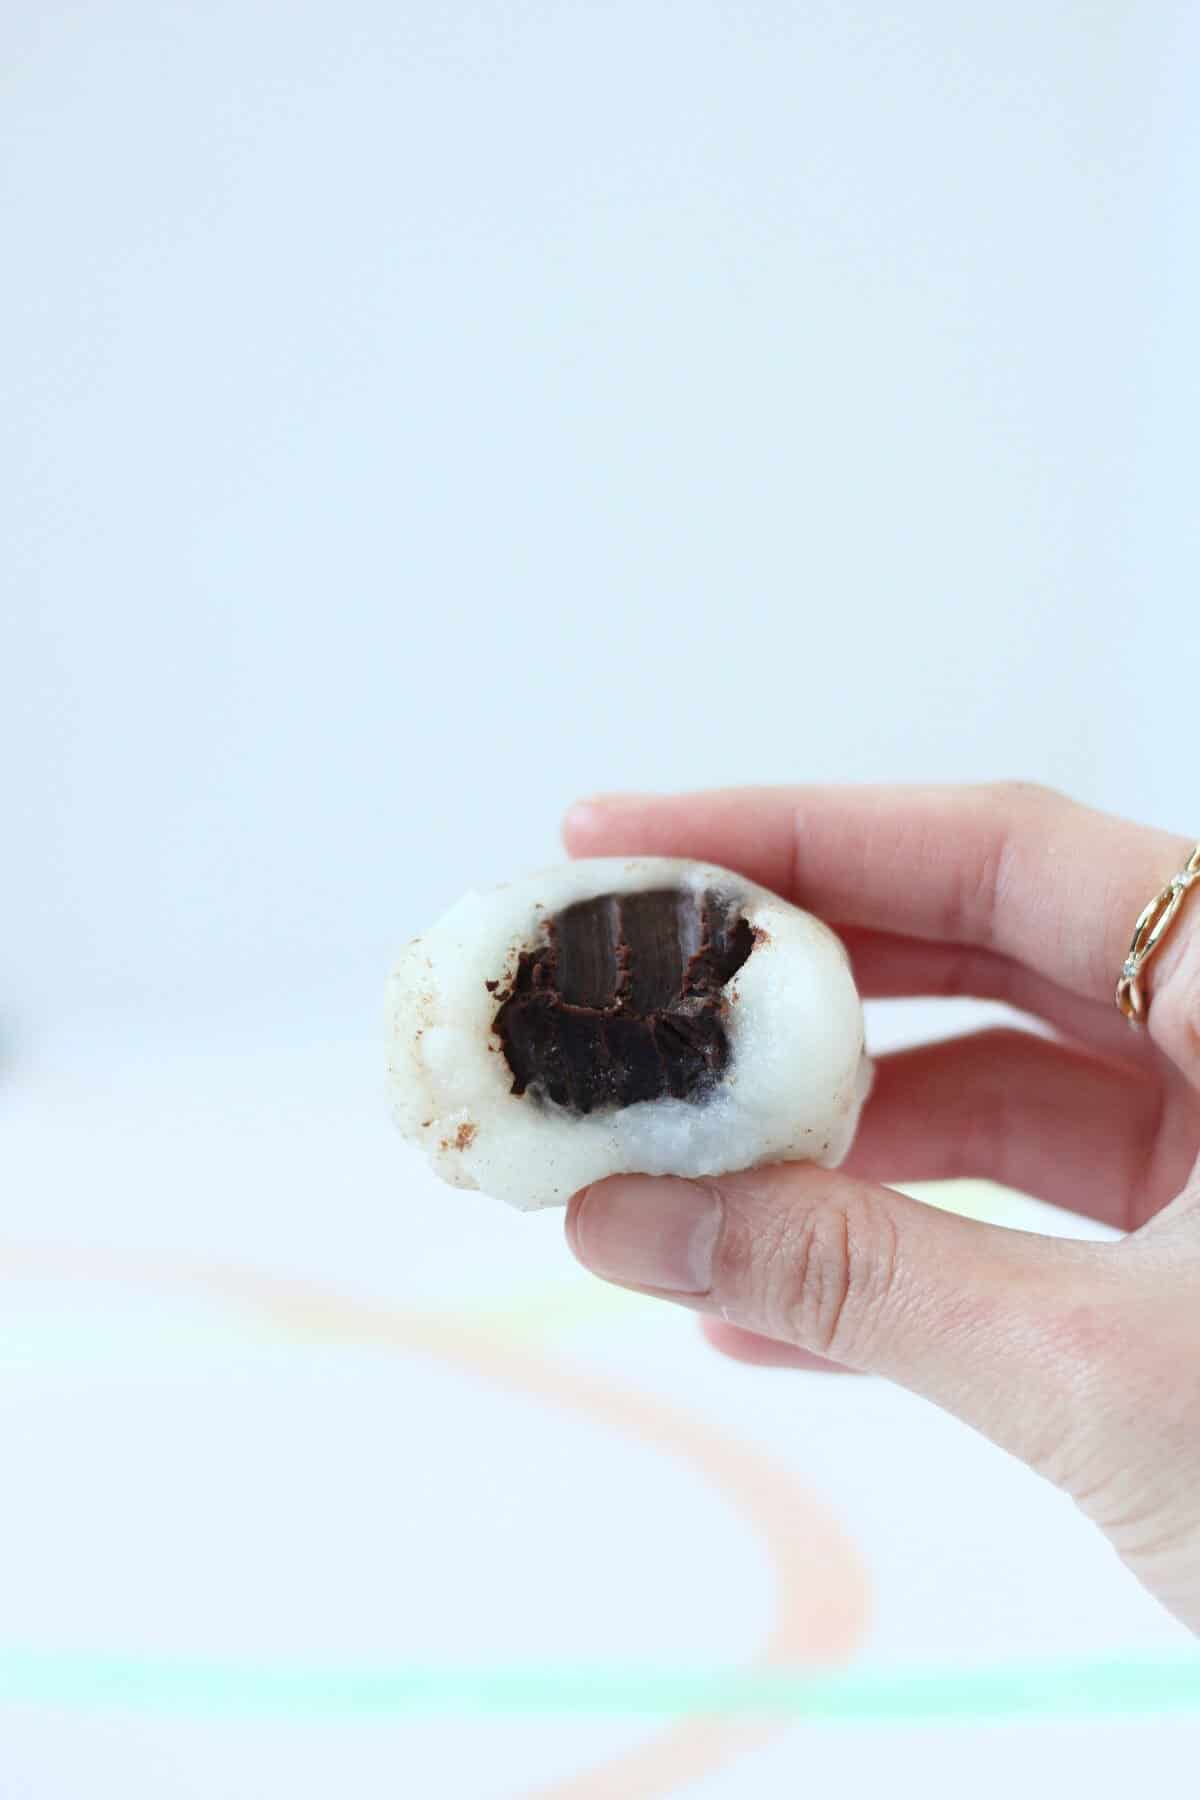
The flavor of this dessert isn’t super surprising, assuming you’ve had a chocolate truffle or a piece of mochi before. It’s very chocolate-forward (don’t worry, I rolled my eyes as I typed that), full of rich chocolate.
I’m not a huge fan of decadent chocolate desserts since they can be really intense for me, so the mochi helps mellow out all that chocolate truffle.
The texture is also a key part of this treat. While the filling and the wrapper are both soft and yielding, the chocolate filling is creamy and buttery, and the mochi is chewy and bouncy.
Storage
This chocolate mochi is best stored either at room temperature or in the freezer.
If you’re planning on serving this mochi within a few days, I would recommend keeping it at room temperature (given that it’s not summer, and the chocolate won’t just melt and seep out).
If you’re not able to give enough away or devour enough to run through your stash within that time period, I would recommend either decreasing the yield of this recipe or storing the mochi in the freezer for up to a few months.
Freezing the mochi keeps the texture soft and chewy, rather than an unpleasant starchy and hard texture that happens when you refrigerate it. I like to place the mochi into cupcake wrappers so that they don’t stick to each other, and house them in an airtight plastic container (no freeze burn pls).
Make sure to let the mochi come to room temperature before enjoying!

- 4.2 ounces dark chocolate chopped
- ½ cup heavy cream
- 1 cup glutinous rice flour
- ⅓ cup granulated sugar
- ¼ teaspoon kosher salt
- 1 cup water
- cornstarch for dusting
-
Place the chocolate in a medium bowl.
-
Warm the heavy cream until it’s steaming, either in the microwave or on the stove. Pour the cream over the chocolate and let it sit for a minute or two. Then, stir until the chocolate is completely melted and you’re left with a dark, smooth and shiny ganache.
-
Place the chocolate ganache in the fridge for a few hours or until firm.
-
While the ganache is chilling, move onto the mochi.
-
Combine the glutinous rice flour, sugar, salt and water. Pour it into a heatproof bowl if it isn’t in one already.
-
You can steam the mochi over the stove or in the microwave; I prefer the stove since it’s more forgiving, but either way works. Stovetop will probably take 30-40 minutes (longer if you’re using a makeshift steamer and have to keep refilling the water), and microwave depends on the strength of your microwave but I would start with 3-5 minutes.
-
Stir the mochi occasionally, making sure to redistribute any liquidy bits. It’s done when the mochi isn’t grainy to the touch or sight, and you can taste to make sure it doesn’t have any raw flour taste. It’ll firm up as it cools, so don’t worry if it seems a bit soft right now.
-
Remove the mochi from the steamer/microwave, and let it cool while you go back to the truffles.
-
Grab a pair of food safe vinyl gloves if you have some. Divide the chocolate ganache into 16 equal portions, and roll the ganache into balls (the gloves help keep the mess off your hands). Set them aside for a bit (you can put them back in the fridge if they’re feeling a bit soft or melty).
-
Dust a big cutting board with a generous amount of cornstarch, then turn the still slightly warm mochi out onto the cornstarch. If the mochi is still too warm to comfortably work with, let it cool more until moving on.
-
Once the mochi is comfortable enough to work with, but still a little warm, divide it into 16 equal pieces, dusting and dipping the mochi into more cornstarch if it gets sticky. It’s okay if it seems like too much cornstarch.
-
With one piece of mochi at a time, flatten it in your gloved palms until it forms a disc. Add a chocolate truffle to the center and bring the edges of the mochi together. I like to try to make some side of the mochi taut and smooth, and gathering the edges of the mochi on the other side, almost like a lumpy soup dumpling.
-
Place the mochi into a cupcake wrapper, pretty side up, and repeat with the remaining ganache and mochi.
Store the mochi at room temperature for up to a few days. If you can’t eat them within a few days, either cut down the yield of the recipe or freeze them in an airtight container for up to a few months.


Leave a Reply